
Here are the 13 best DIY methods to replace a broken USB port on your laptop. We have mentioned the required tools along with this explanation.
How to Replace a USB Port on a Laptop? You can replace the USB port on your laptop by turning off the laptop, unplug all devices, remove the back cover, remove the broken port, replace it with a new USB port, fix the screws and back cover, and give a test run.
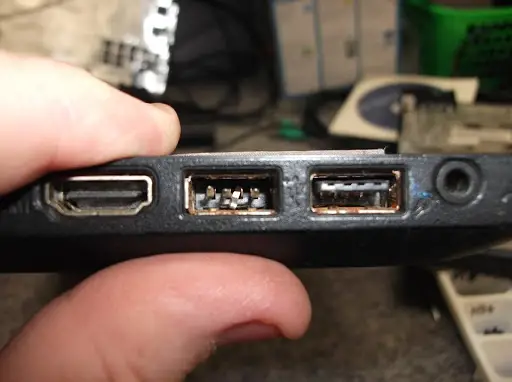
It is a standard cable connection port on the laptops and other consumer electronic gadgets. USB is the short form for a Universal serial bus. It helps to transfer digital data from a short distance with the help of USB cables.
It plays a vital role in the hardware of your electronic device. A lot of tools can connect with the computer through the port of that computer. Cell phones, digital cameras, music players and speakers, etc. are all linked to the computer with the help of these. When a device is connected to the network via this, it is usually automatically recognized.
Contents
- 1 How to Replace a USB Port on a Laptop?
- 2 Identify the problem
- 3 Tools required
- 4 Unplug all the devices
- 5 Remove the back cover of the laptop
- 6 Remove the parts to access the USB port
- 7 Remove the faulty port
- 8 Check its problem and its surrounding parts
- 9 Purchase a high-quality USB 3.0 port
- 10 Replace the USB port
- 11 Tight the screws
- 12 Plug all the wires back
- 13 Fix the cover
- 14 Give a test run
How to Replace a USB Port on a Laptop?
While working with a personal computer, everything never goes smoothly. If your USB port is not working, there can be numerous reasons for that. First of all, you will make sure that your gadget needs replacement or not.
If your laptop is not detecting any connected USB device, then there can be an issue in the components of your gadget.
Identify the problem
Identify the issues with your device and its parts. You may have damaged the device, and the port itself can create problems. Its drivers can be missing, or your computer may have some difficulty in searching for the devices.
It may be harmed by force, or they fail by themselves. To check if it is damaged or not, try to plug different types of devices in the slot. If none of them is working, most probably, the parts are broken.
Try to connect these same gadgets on other computers. If they are working on different electronic machines, this indicates that your equipment is damaged. Make sure your computer and devices connected to it are working correctly.
Also, ensure that both have the newest drivers. For this purpose first, run the windows updates. Click on the Start button. After that type, Update on the explore bar. Click on the options of Windows Update and then click on Check for Updates. If any windows updates are available, install them.
Click on the start button located on the desktop of your notebook. Then type ‘device manager’ in the search bar. The link of the device manager will appear on the screen, click on that link to open the Device manager of your windows.
Click on the properties tab search if your device is working correctly. If this device is working correctly option appears for each part of your gadget, then most probably your gadget is not harmed; instead, there can be an issue with some other parts.
Click on the Update Driver, an option on the screen. You will find this option in the device manager. Windows will search and install the newest driver. If you are not able to find, visit the website of the manufacturer of your gadget and download and install the driver from that website.
Tools required
After the problem identification, the next step is to know which tools are required for the replacement.
- Head Screwdriver
- Gloves
- Goggles
Unplug all the devices
Turn off your device and then disconnect the electronic tools from your gadget. Make sure that there is not any cable connected to your computer. And then place it on a smooth, uncluttered table for the further process. Don’t put it on the carpet or any other thing that can produce static electricity.
Remove the back cover of the laptop
For the replacement of the damaged parts, first of all, you have to remove the back cover of your notebook. For removing the back cover, you need to power off your computer at first. Disconnect any secondary connection and its power cable. Close down the lid of your computer and heedfully place down the face of your gadget in a flat area.
Find the holding screws on the back of your device. To detach the screws, use the head screwdriver. Remember each screw location as these will be replaced in a similar arrangement as you detached them, after removing the screws takeout the back cover.
Remove the parts to access the USB port
After detaching the back cover of your device, separate the parts carefully that is creating hindrance in the way of the device. You will take special care while detaching the parts so that they do not get damaged in the process. For this purpose, you can also get advice from the expert.
Remove the faulty port
Carefully remove the broken and faulty parts, so that other parts of your device may not be destroyed. Detach all the cables carefully and take out the broken accessories from your gadget. Follow the given process for detaching the faulty device.
- First of all, you will power off your gadget.
- Wear gloves, goggles for the protection of your eyes and hands.
- Open the parts with the help of a screwdriver.
- Open the case of the computer by detaching the side panel.
- Then open the processor part of your notebook with nuts.
- Open the screws
- Remove the damaged USB port carefully from your device.
Check its problem and its surrounding parts
Check the issue with that faulty device that what the actual issue is. There can be several reasons behind the defected device. The connectors get dirty with time and won’t work. If the accessories are not connecting and working with your correctly, then there is some serious problem with your gadget.
If there is any damaged part in the surrounding, then fix that problem and check again if it is working after fixing the problem or not. If you are hiding a laptop from parents in a cupboard, then dust can accumulate around its parts.
Purchase a high-quality USB 3.0 port
Buy the best quality accessories for your notebook. While buying the new product, make sure that you are purchasing the tool of the same size that is fixed on your computer. You can buy the device from any local store or online. Do not forget to take advice while purchasing the equipment. Attach the new port appropriately.
It supports almost all the updated devices and gadgets. It can transfer the data at the rate of 5120 Mbps or five Gbps and you can also use the Bitmoji app on your laptop.
Replace the USB port
Now it’s time to change the device by adopting the appropriate method. If the defected part is located at the front side of the case, you will require a hub for the front panel.
If it is situated at the back of your device, then first find out whether the port is a unit of the motherboard or it is connected with the PCI slot. PCI is a white, rectangular long slot. A controller card is required if it is attached to the PCI slot. Or else you cannot change the damaged part without the replacement of the whole motherboard.
Tight the screws
Put the new product at a place where the previous one was fixed. Hold it from both ends and press it firmly downward. This will lock the product in the PCI slot. After adjusting it in its place, carefully tighten the screws. Use gloves during the process so that your hands won’t get hurt by the process.
Plug all the wires back
Carefully connect all the wires. Do not forget to remember the default setting while opening the device. Now this will guide you for making its setting as default. Join them in the same order as they were connected before.
If you slightly change the order of the wires, it won’t work. Make sure you have attached all the cables correctly. This is a must otherwise your laptop can type wrong letters.
Fix the cover
Now you have appropriately replaced your device. Finalize the process by fixing the back cover of your computer. Carefully do it with the required tools mentioned above. Be careful while fixing the lid so that it cannot be broken or get damaged. The other parts, like wires, can also be injured while attaching the cover, so you need to take a careful approach for this work.
Give a test run
After properly fixing the part and joining all the wires, check if the device is working correctly or not. Plug a device into the port and observe it. If it is working, then congratulation; you have successfully changed the damaged part with a new one.